
The most exquisite coat of paint is only as enduring as the invisible work performed beneath its surface. While we often view a home’s transformation through the lens of color and light, the true artistry lies in the quiet discipline of the preparation. If you’ve ever felt the anxiety of a project turning into a peeling nightmare or felt overwhelmed by the daunting mess of repairs, you’re not alone. Mastering how to prepare walls before painting is the definitive line between a temporary fix and a professional-grade masterpiece that stands the test of time.
This masterclass reveals the meticulous steps required to transform your interior walls into a flawless, purified canvas. You’ll move past the confusion of which cracks to fill and which textures to sand, replacing uncertainty with the steady confidence of a seasoned craftsman. We’ll guide you through a methodical process of cleaning, repairing, and priming that ensures your investment in luxury finishes is never compromised. From understanding the synergy of a clean surface to executing the perfect sand, you’ll gain the knowledge to create a durable finish that brings a renewed sense of pride and harmony to your environment.
Key Takeaways
- Understand why 90% of a professional result is achieved through meticulous surface restoration before the first drop of paint is ever applied.
- Learn how to use the “raking light” technique to identify hidden imperfections that could compromise the final aesthetic of your space.
- Discover how to prepare walls before painting by employing professional cleaning standards to eliminate the oils and dust that often lead to paint failure.
- Master the technical secrets of sealing tape edges and caulking trim gaps to create the crisp, elegant lines found in high-end residences.
- Evaluate the scale of your project to decide when professional-grade equipment is necessary to ensure a durable and flawless transformation.
The Philosophy of Preparation: Why Surface Integrity Dictates Aesthetic Success
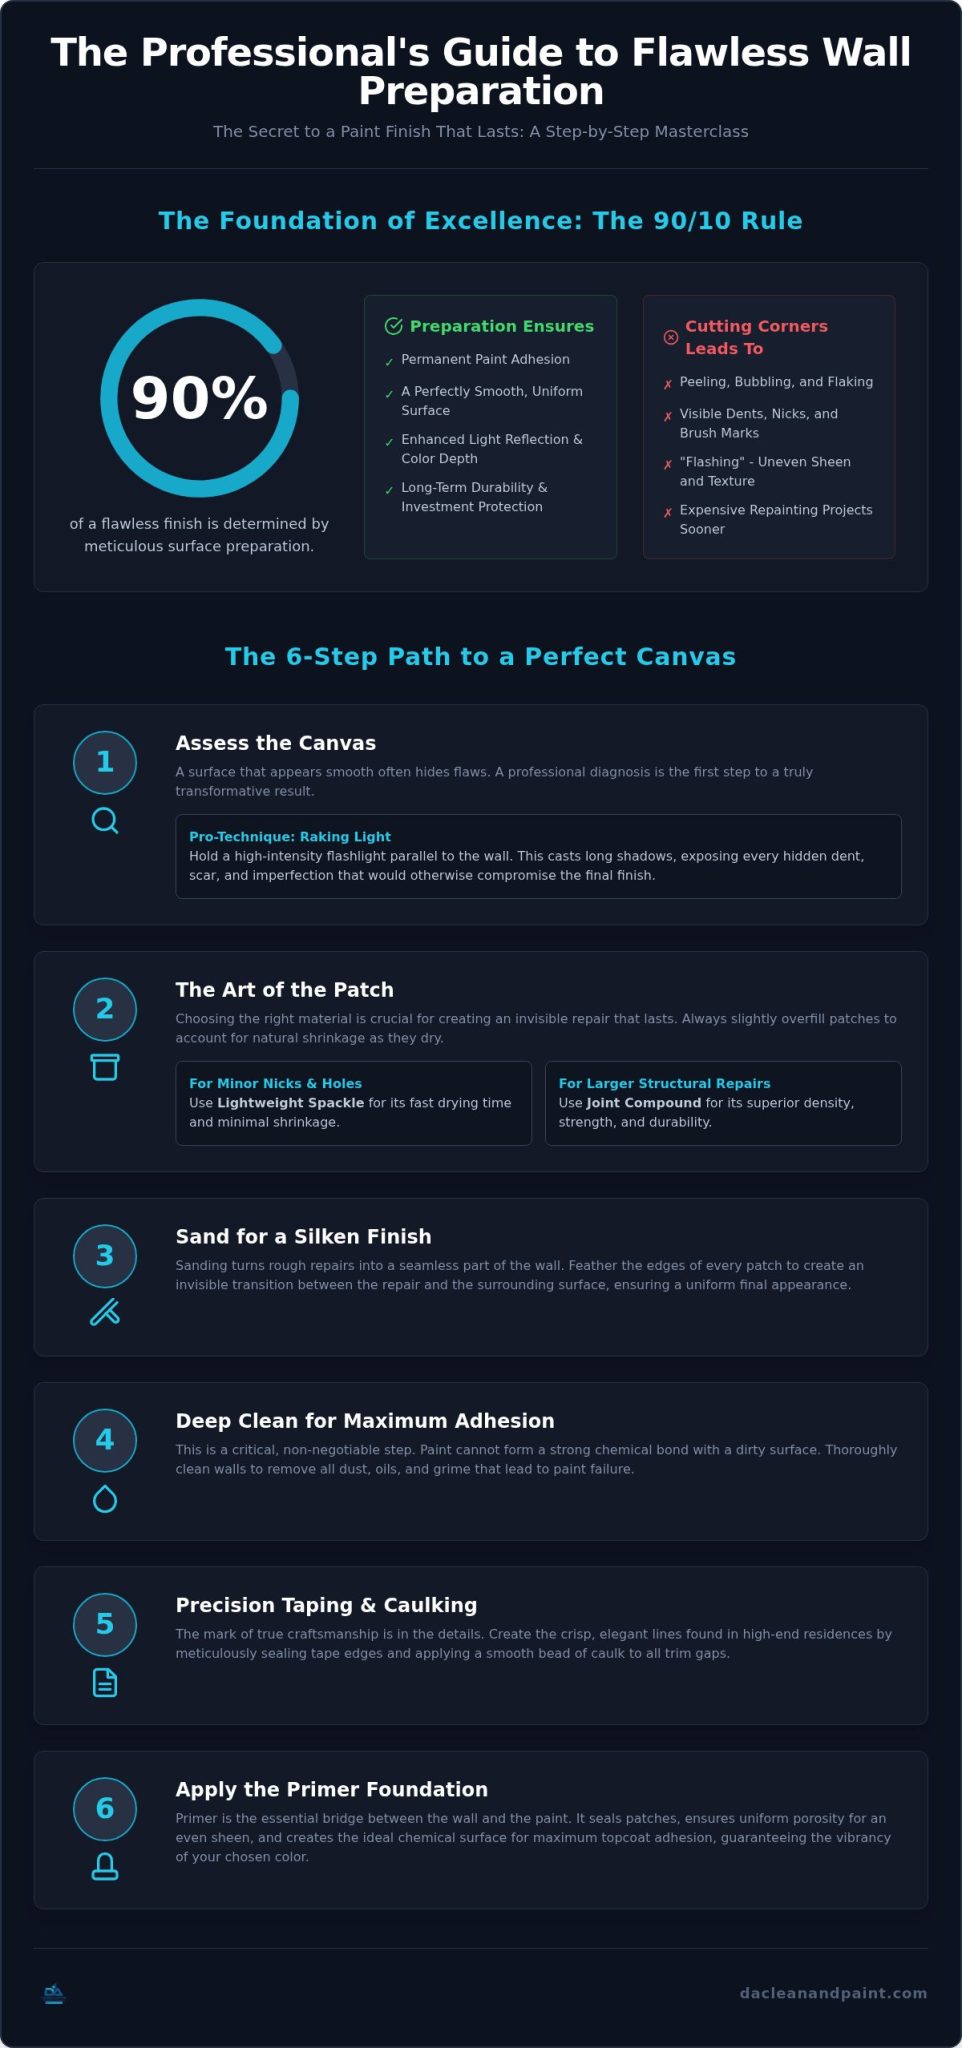
True excellence in interior design begins long before the first canister of pigment is opened. We view wall preparation not merely as a preliminary chore, but as a vital restoration of a surface’s structural and chemical integrity. Professional artisans adhere to the 90/10 Rule; this principle dictates that ninety percent of a flawless finish is determined by the labor invested before the brush ever touches the substrate. Understanding how to prepare walls before painting is the essential first step in ensuring that your home’s aesthetic elevation is both profound and permanent.
A critical component of this process is achieving superior adhesion. Adhesion is the fundamental chemical bond between the substrate and the coating that prevents future peeling and ensures the paint remains a permanent part of the wall. To understand the science behind this, one might look at The Role of Primers in Paint Adhesion, as these intermediate layers serve as the bridge between raw material and refined color. By prioritizing this foundation, you preserve the longevity of your investment in premium, eco-friendly paints. This meticulous approach ensures the vibrancy of the hue remains untarnished for years to come.
The Consequences of Cutting Corners
Bypassing the foundational stages of preparation often results in visible artifacts that no amount of paint can conceal. Old brush marks, subtle nicks, and uneven textures are magnified by fresh pigment rather than hidden by it. In the specific climate of Jacksonville and Orange Park, poor preparation invites structural failure such as bubbling or flaking due to high humidity levels. The financial impact of a rushed job is often significant. It necessitates expensive repainting projects far sooner than a professionally prepared surface would require, turning a perceived saving into a long-term cost.
Aesthetic Transformation and Renewal
Approaching preparation as a form of artistic restoration changes the entire energy of a project. A perfectly smooth wall does more than look clean. It dramatically enhances the light-reflective qualities of high-end finishes, allowing colors to appear more luminous and deep. There is also a profound psychological benefit to starting with a pure, meticulously curated environment. It creates a sense of harmony and order that serves as the perfect backdrop for your daily life. This process transforms a routine maintenance task into a genuine elevation of your personal sanctuary, providing a sense of pride that only true craftsmanship can deliver.
Assessing the Canvas: Identifying and Repairing Structural Imperfections
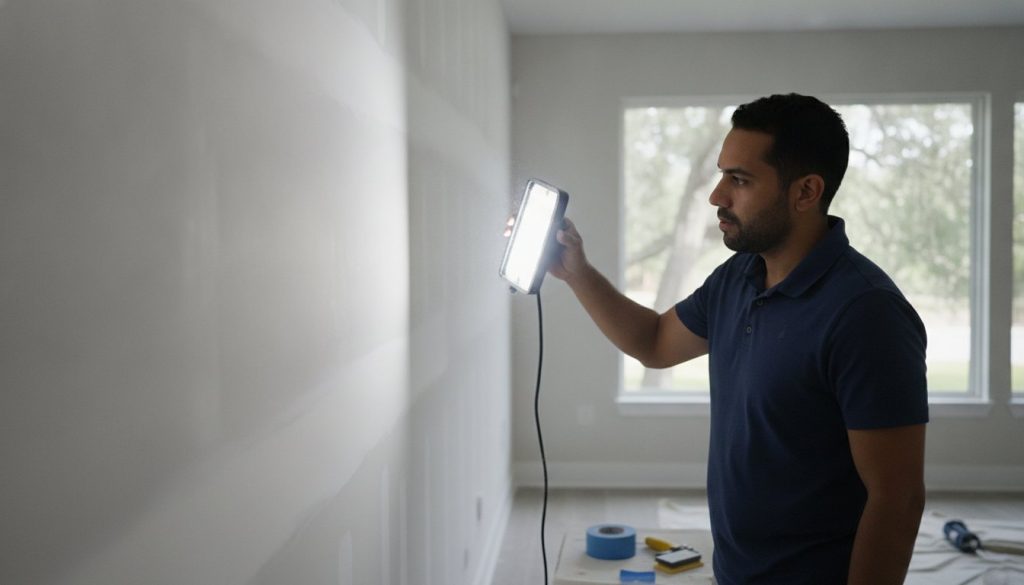
Before you apply a single drop of pigment, you must understand the unique topography of your walls. A surface that appears smooth under standard overhead lighting often reveals a landscape of hidden dents and scars when subjected to ‘raking light.’ By holding a high-intensity flashlight parallel to the surface, you cast long shadows that expose every imperfection. This diagnostic step is a hallmark of professional excellence. Once these flaws are identified, you must remove failing hardware and redundant wall anchors. If an anchor resists removal, tap it slightly below the surface of the drywall to create a recess for patching. Learning how to prepare walls before painting requires this level of diagnostic precision to ensure the final result is truly transformative.
The Art of the Patch
Filling a simple nail hole requires a different touch than repairing a deep gouge. For minor nicks, a lightweight spackle suffices due to its fast drying time and minimal shrinkage. However, larger structural repairs demand the density and strength of a professional joint compound. You should always overfill these areas slightly, as compound naturally shrinks as the moisture evaporates during the curing process. Neglecting this step often leads to ‘flashing,’ which is a visible variation in the paint’s sheen or texture caused by the differing porosity of the patch compared to the surrounding substrate. For those following a comprehensive guide to wall preparation, mastering this invisible transition through meticulous feathering of the edges is vital for a high-end finish.
Sanding for a Silken Finish
Sanding is where the restoration truly takes shape, turning rough repairs into a seamless canvas. Begin with a 120-grit abrasive to level the patches, then transition to a 220-grit for a polished, silken finish. Professionals often utilize pole sanding for expansive surfaces to maintain consistent pressure and reach, while reserving hand-sanding blocks for the delicate contours of architectural trim. A true artisan never ignores the resulting debris. Managing dust with a high-efficiency vacuum and a damp microfiber cloth is non-negotiable to prevent microscopic particles from marring your new coat. If the scale of these repairs feels overwhelming, engaging professional interior painting services ensures every detail is handled with the precision your home deserves.
The Critical Foundation: Deep Cleaning for Maximum Paint Adhesion
Even a wall that presents a flawless visage to the casual observer often harbors a microscopic layer of oil, dust, and environmental pollutants. These invisible contaminants act as a persistent barrier between the substrate and your new coating, causing the paint to bead or peel over time. Our unique heritage in both elite cleaning and high-end painting allows us to approach every project with a “clean-first” mentality that most standard painters overlook. Mastering how to prepare walls before painting requires this level of purification, ensuring that your investment in premium materials is never compromised by a lack of surface hygiene.
Different environments demand bespoke cleaning protocols to ensure total adhesion. In a kitchen, you must prioritize the removal of vaporized cooking oils that settle on every surface, while bathroom walls require the elimination of alkaline soap scum and mineral deposits. A simple wipe-down is rarely sufficient for these persistent residues. Once the primary cleaning is complete, a final pass with a high-quality tack cloth is essential to create a zero-dust environment. This meticulous step ensures that no stray particles are trapped beneath the pigment, preserving the silken texture of your finish.
Tackling the Florida Factor: Mold and Mildew
In the high-humidity zones of Jacksonville and Fernandina Beach, biological pollutants like mold and mildew are more than just an eyesore; they are a threat to the structural integrity of your paint. You must neutralize these spores with a dedicated bleach-water solution rather than simply concealing them with a fresh coat. Painting over active mold only traps the moisture, leading to rapid failure and health concerns. If you notice persistent dampness near glass surfaces, it may indicate that your home’s envelope is compromised. In such cases, seeking a professional window caulking service is a vital prerequisite to ensure your interior remains dry and protected before the painting begins.
The Chemically Clean Surface
For walls burdened with heavy grime or soot, Trisodium Phosphate (TSP) remains the gold standard for creating a “etched” surface ready for primer. However, for most modern interiors, mild eco-friendly detergents provide a sophisticated balance of power and safety. The most critical phase of chemical cleaning is the rinsing protocol. You must ensure that no soapy residue remains, as these surfactants can interfere with the primer’s ability to bond. Verify your progress with a “white glove” test; if a clean microfiber cloth shows any trace of grey after a firm wipe, the surface is not yet ready for the next phase of its transformation.
Technical Mastery: Precision Taping, Caulking, and Priming
Precision is the hallmark of the artisan. Once the surface is purified, the transition to technical preparation defines the crispness of your home’s final aesthetic. Understanding how to prepare walls before painting requires a disciplined focus on the boundaries where color meets architecture. A professional secret for achieving razor-sharp lines involves sealing the edges of your painter’s tape with a microscopic bead of caulk or a thin layer of the wall’s base color. This creates a physical barrier that prevents pigment from bleeding beneath the adhesive, ensuring a finish that looks curated rather than merely applied.
The true distinction of high-end interior painting services Jacksonville FL is found in the treatment of transitions. Gaps between walls and crown molding or baseboards are often overlooked in DIY projects, yet these small voids can disrupt the visual harmony of a room. Filling these spaces with a premium, flexible caulk creates a seamless flow that elevates the entire space. If you find the technical demands of these finishing touches daunting, the experts at D&A Cleaning and Painting Services provide the meticulous skill necessary to ensure every corner of your residence reflects a standard of refined excellence.
The Taping Protocol
Applying painter’s tape is an exercise in restraint and steady hands. You must avoid stretching the tape during application, as the tension eventually causes the adhesive to pull away from the surface and allow paint to seep through. Utilize a “knife-edge” technique by pressing the tape firmly into corners with a clean putty knife for absolute precision. The timing of removal is equally vital. While many debate the “wet-peel” versus “dry-score” methods, removing the tape while the paint is still slightly tacky often yields the cleanest results, provided you pull it back at a sharp 45-degree angle.
Priming as a Protective Barrier
Primer acts as the essential bridge between the old substrate and your new aesthetic vision. While many modern products claim to be “Paint + Primer” in one, these are often insufficient for professional-grade transformations, especially when dealing with significant color shifts or porous repairs. A dedicated high-hide primer is necessary for dramatic color changes, while a stain-blocking primer is non-negotiable for covering old water damage or wood tannins. A sophisticated pro tip is to tint your primer toward the final wall color. This increases the depth of the hue and often reduces the number of topcoats required to achieve a rich, luxurious finish. In the unique humidity of the Florida coast, respecting the manufacturer’s drying times is critical; rushing the re-coat window is the most frequent cause of finish failure. Once your primer is cured, understanding how to choose paint finish for Florida humidity and salt air becomes the next essential decision in protecting your investment against our coastal climate.
Elevating Your Space: DIY vs. Professional Craftsmanship
Deciding between a weekend DIY project and professional engagement often comes down to the scale of your vision. While mastering how to prepare walls before painting is a rewarding endeavor for a single accent wall, a whole-home renewal introduces complexities that can quickly become overwhelming. The “Equipment Gap” remains a primary differentiator in these projects. Professional airless sprayers and specialized high-reach tools achieve a level of uniform coverage and silken texture that standard rollers simply cannot replicate. For busy Jacksonville homeowners, the transition from the chaos of a renovation to the calm of a finished sanctuary is most efficiently managed by disciplined experts who treat every room as a creative endeavor.
Engaging a professional partner provides more than just a flawless finish; it offers the peace of mind that comes from bespoke design consultation and technical precision. A seasoned technician understands the nuances of light and shadow, ensuring that the structural repairs discussed earlier are truly invisible. This level of craftsmanship transforms a house into a curated residence. It allows you to enjoy the process of renewal without the physical toll of meticulous sanding and deep cleaning.
The D&A Signature Approach
We offer a unique synergy by integrating professional cleaning standards with elite painting and design. This holistic method ensures that every substrate is purified and every hue is curated to harmonize with your home’s unique architecture. Our commitment to high-performance, low-VOC materials is particularly vital for maintaining healthy indoor air quality in our coastal climate. This bespoke approach ensures that your environment is not just beautiful, but also a sanctuary of comfort and safety. If you’re ready to move beyond routine maintenance, you can request a personalized consultation for our home transformation services Jacksonville FL.
Final Checklist for a Flawless Finish
Achieving a professional-grade result requires a commitment to the “Art of Detail” at every stage of the project. Before you begin the transformation, ensure you’ve addressed these critical steps:
- Identify hidden imperfections using the raking light technique.
- Remove failing hardware and patch with compounds that account for shrinkage.
- Sand surfaces to a silken finish, transitioning from 120-grit to 220-grit abrasives.
- Deep clean all surfaces to eliminate oils, dust, and biological pollutants common in Florida.
- Apply specialized primers to create a durable, chemically bonded foundation for your color.
Always prioritize quality over speed to ensure the lasting beauty of your investment. If you desire a stress-free experience with a result that evokes a sense of pride and harmony, contact D&A Cleaning and Painting Services today to begin your home’s artistic elevation.
Embracing the Transformation of Your Home
A home’s true elegance is revealed in the transition from a weathered surface to a refined, luminous sanctuary. By mastering how to prepare walls before painting, you ensure that every choice of color is supported by structural integrity and deep-level purification. Whether you are meticulously patching imperfections or executing a professional-grade priming protocol, your dedication to these foundational steps preserves the longevity of your investment. Precision is our standard.
As Jacksonville’s trusted choice for refined interior and exterior painting, we bring meticulous artisan standards to every project. Our commitment to eco-friendly, high-quality materials ensures that your home remains a safe and beautiful environment. We proudly serve homeowners in Orange Park, Fernandina Beach, and throughout the surrounding regions, providing a seamless transition to a polished result.
Experience the Art of Detail: Schedule Your Professional Painting Consultation Today
Your journey toward a more harmonious living space begins with the quiet discipline of preparation. It’s time to enjoy the sense of pride that comes with a flawless, professional transformation.
Frequently Asked Questions
Do I really need to wash my walls if they look clean?
Yes, washing is essential because walls accumulate invisible oils, fingerprints, and microscopic dust that prevent pigment from bonding. Even in a pristine-looking home, these contaminants act as a barrier to proper adhesion. Our signature approach integrates professional cleaning standards to ensure your substrate is truly purified. This extra step prevents the frustration of peeling or bubbling, guaranteeing that your investment in premium paint delivers the enduring, flawless finish you expect.
How long should I wait for the spackle to dry before sanding?
You should typically wait between thirty minutes and two hours, though deeper repairs may require a full twenty-four hours to cure. In the humid climate of Jacksonville, moisture evaporates more slowly, so patience is a virtue for the disciplined artisan. Sanding damp compound leads to clumping and an uneven texture. Always wait until the patch feels cool and dry to the touch and appears uniform in color before attempting to level the surface.
Can I skip the primer if I am using a high-quality paint?
Skipping primer is rarely advisable, as it serves as the critical chemical bridge between the old surface and your new aesthetic. Even high-quality paints struggle to bond with porous repairs or glossy old coatings without this foundational layer. Professional results depend on knowing how to prepare walls before painting with a dedicated primer. It seals the substrate, provides a uniform porosity, and ensures the final color appears rich and consistent across the entire expanse.
What is the best way to remove dust after sanding walls?
The most effective method involves a two-stage purification process starting with a high-efficiency vacuum equipped with a brush attachment. Once the majority of the debris is removed, use a high-quality tack cloth or a slightly damp microfiber cloth to capture the remaining microscopic particles. This ensures a zero-dust environment. Failing to remove this fine powder will mar the silken texture of your finish, trapping grit beneath the pigment and compromising the final polish.
How do I deal with mold on my walls before painting in Jacksonville?
You must neutralize mold spores with a solution of one part bleach to three parts water before any painting begins. Simply covering biological pollutants with pigment allows them to continue growing beneath the surface, eventually leading to structural failure. In Jacksonville’s high-humidity environment, identifying the source of moisture is equally important. Once the area is scrubbed and thoroughly dried, apply a mold-resistant primer to provide a protective barrier against future environmental challenges.
Is it better to use a brush or a roller for priming?
A combination of both tools is necessary to achieve a professional-grade result. Use a high-quality brush to “cut in” around the architectural trim and corners where precision is paramount. For the expansive sections of the wall, a roller with the appropriate nap provides a uniform, efficient application. This dual-tool approach ensures the primer is worked into the texture of the substrate, creating the consistent foundation required for a truly sophisticated and enduring topcoat.
How do I prevent paint from bleeding under the painter’s tape?
To ensure absolute precision, seal the edge of your painter’s tape with a very thin layer of the existing wall color or a microscopic bead of paintable caulk. This technique creates a physical seal that prevents the new pigment from seeping into the tape’s texture. Understanding how to prepare walls before painting with these technical secrets is what separates a DIY effort from an artisan’s masterpiece, resulting in the razor-sharp lines that define luxury interiors.
What should I do if my walls have a heavy texture?
Heavy textures require extra diligence during the cleaning phase, as the recesses frequently harbor hidden dust and cobwebs. When applying primer or paint, select a roller with a thicker nap, typically half an inch or greater, to ensure the pigment reaches into every crevice. If you desire a smoother aesthetic, you might consider a professional skim-coating service. This process levels the surface, transforming a dated texture into a pristine, modern canvas for your home. For coastal homeowners, pairing this smooth foundation with the right sheen is equally important; our guide on choosing paint finishes that withstand Florida humidity and salt air provides the professional insight needed to make that final selection with confidence.